Post-Mold Removal Home Restoration
Welcome to our in-depth discussion on the often-overlooked yet crucial phase that follows mold remediation – home restoration. This blog is dedicated to shedding light on why restoring your home after mold removal is not just beneficial but necessary, and what this process typically entails.
Mold remediation is a critical process for ensuring a healthy living environment, but it’s only part of the solution. Post-remediation, the focus shifts to home restoration – a step that reinstates the safety, functionality, and aesthetics of your home. In this introduction, we will explore the necessity of home restoration following mold remediation, emphasizing its importance in bringing your home back to its pre-mold condition.
Restoration work can vary widely in scope, depending on the extent of the mold damage and the areas affected. It may involve simple tasks such as repainting and replacing small fixtures, or more extensive work like reconstructing damaged walls, replacing large sections of flooring, or even overhauling entire rooms. This phase is crucial not only for aesthetic reasons but also for ensuring the structural integrity and safety of your home.
Join us as we delve into the world of home restoration post-mold remediation. Whether you are a homeowner who has recently undergone mold removal or someone interested in understanding the full spectrum of dealing with mold issues, this blog will provide you with essential insights into the restoration process and its significance.
Assessing the Extent of Damage Post-Mold Removal
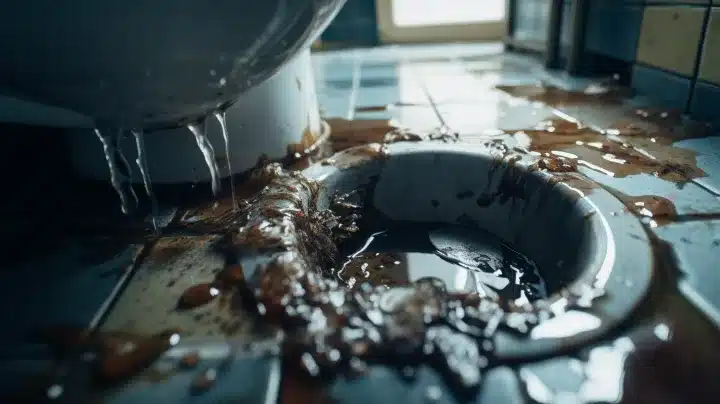
After mold has been removed from a home, it’s crucial to assess the extent of damage it has caused. This assessment is key to determining the necessary restoration work. This section of the blog will guide you through identifying areas needing restoration and discuss the benefits of professional assessment versus DIY inspection.
Identifying Areas Needing Restoration
Evaluating which parts of your home have been affected by mold is the first step in the restoration process:
- Visual Inspection: Start with a thorough visual inspection of the areas where mold was present. Look for signs of damage such as discolored walls, warped floors, or deteriorated wood.
- Smell Test: Mold often leaves behind a musty odor, even after removal. If certain areas still smell musty, this could indicate lingering mold or water damage.
- Moisture Check: Use a moisture meter to detect any remaining moisture in walls, floors, and ceilings. Excess moisture can lead to further mold growth and structural damage.
- Check Hidden Areas: Inspect behind walls, under floors, and in other hidden areas where mold might have spread. This often requires removing a portion of the drywall or flooring.
- Assess Material Condition: Evaluate the condition of materials like insulation, drywall, and carpet. These materials might need replacement if they have been severely damaged by mold.
Professional Assessment vs. DIY Inspection
While a DIY inspection can identify obvious signs of damage, a professional assessment offers several benefits:
- Expertise and Experience: Professionals have the expertise and experience to identify not-so-obvious signs of mold damage and can assess the structural integrity of the home.
- Advanced Tools: Professionals use advanced tools like infrared cameras and moisture meters to detect hidden moisture and mold, ensuring a more thorough assessment.
- Accurate Evaluation: A professional assessment provides a more accurate evaluation of the damage, which is crucial for planning the restoration work and for insurance claims.
- Safety Considerations: Professionals can safely assess areas that might be hazardous for homeowners to inspect, such as crawl spaces or attics with structural damage.
Planning Your Home Restoration Project
After mold removal, planning a home restoration project is a critical step to bring your home back to its former state or even improve it. This section of the blog will guide you through setting realistic goals and timelines for your restoration project, as well as provide tips for effective budgeting and cost considerations.
Setting Realistic Goals and Timelines
Creating a feasible plan for your home restoration is essential:
- Assess the Scope: Start by assessing the extent of the damage. This will help you understand the scale of the restoration project and what needs to be prioritized.
- Define End Goals: Determine what you want to achieve with the restoration. Are you looking to simply repair the damage, or are there improvements and upgrades you wish to incorporate?
- Develop a Timeline: Based on the scope and end goals, develop a realistic timeline. Consider factors like the availability of contractors, lead times for materials, and any personal or seasonal considerations.
- Plan for Phases: If the project is extensive, consider breaking it down into phases. This can make the project more manageable and less disruptive.
- Flexibility: Be prepared for unexpected delays or issues. Building some flexibility into your timeline can help reduce stress and make the process smoother.
Budgeting for Restoration Costs
Effective budgeting is crucial for a successful restoration project:
- Detailed Cost Estimation: Get detailed cost estimates for all aspects of the restoration, including materials, labor, permits, and any additional services like design or architecture.
- Set a Budget: Based on the estimates, set a realistic budget. It’s advisable to include a contingency fund of around 10-20% for unforeseen expenses.
- Prioritize Spending: If budget constraints exist, prioritize spending on structural repairs and essential improvements before cosmetic changes.
- Seek Multiple Quotes: Obtain quotes from several contractors to ensure you are getting competitive and fair pricing.
- Consider Long-Term Savings: While budgeting, consider investments that might offer long-term savings, such as energy-efficient materials or appliances.
Repairing Structural Damage Post-Mold Remediation
After mold remediation, addressing the structural damage it leaves behind is crucial to restore the safety and integrity of your home. This section of the blog will cover the steps to repair water damage and wood rot caused by mold, as well as provide guidelines for reconstructing and reinforcing damaged structures.
Addressing Water Damage and Rot
Water damage and wood rot are common consequences of mold that require immediate attention:
- Assess the Extent of Damage: Begin with a thorough assessment to determine the extent of water damage and wood rot. This may involve inspecting framing, subfloors, and other structural elements.
- Remove Damaged Materials: Carefully remove and dispose of all damaged materials, such as rotted wood or water-damaged drywall. This step is essential to prevent further deterioration and mold growth.
- Dry Out the Area: Ensure the affected area is completely dry. Use dehumidifiers and fans to remove moisture. This step is crucial before any repair work begins.
- Treat for Mold and Rot: Treat the area with fungicides or mold-resistant products to prevent future mold growth and wood rot.
- Repair and Replace: Repair or replace damaged structural elements. Use materials that are resistant to moisture and mold for added protection.
Rebuilding and Reinforcing Affected Areas
Reconstructing and reinforcing areas damaged by mold involves careful planning and execution:
- Use Quality Materials: When rebuilding, choose high-quality, durable materials that can withstand moisture and are less prone to mold growth.
- Reinforce Structures: In areas where the structure has been weakened, consider additional reinforcement to ensure stability and safety.
- Update Insulation and Ventilation: If insulation was affected, replace it with mold-resistant insulation. Improve ventilation in areas like attics and basements to prevent future moisture accumulation.
- Professional Assessment: For extensive structural damage, consult with a structural engineer or a professional contractor to ensure the repairs meet safety standards.
- Building Codes and Permits: Ensure that all reconstruction work complies with local building codes. Obtain necessary permits before starting any major rebuilding work.
Restoring Walls, Floors, and Ceilings After Mold Damage
Mold damage can significantly impact the structural and aesthetic integrity of walls, floors, and ceilings in a home. This section of the blog will delve into effective techniques for repairing or replacing mold-damaged drywall and paneling, as well as best practices for restoring floors and ceilings that have been compromised by mold.
Remedying Mold-Damaged Drywall and Paneling
Mold can severely damage drywall and paneling, necessitating careful repair or replacement:
- Assessment and Removal: Begin by assessing the extent of mold damage on drywall and paneling. If the mold has penetrated deeply, it’s necessary to remove and replace the affected sections.
- Safe Removal Practices: When removing mold-damaged materials, wear protective gear and contain the area to prevent the spread of mold spores.
- Treating the Area: After removal, treat the exposed framing and cavity with a mold-resistant primer or fungicide to prevent future mold growth.
- Replacing Materials: Install new drywall or paneling. Consider using mold-resistant drywall, especially in moisture-prone areas like bathrooms and basements.
- Finishing Touches: Once the new materials are installed, finish the surfaces with paint or wallpaper. Opt. for mold-resistant paint to add an extra layer of protection.
Flooring and Ceiling Restoration
Restoring mold-damaged floors and ceilings requires a careful approach:
- Flooring Restoration: For mold-damaged flooring, remove the affected floor coverings, whether it’s carpet, hardwood, or laminate. Assess the subfloor for mold damage and replace it if necessary. When reinstalling flooring, consider moisture-resistant options like tile or treated wood.
- Ceiling Repair: Mold on ceilings should be treated promptly. If the mold is superficial, cleaning and repainting may suffice. For more extensive damage, remove and replace the affected ceiling materials. Ensure the space above the ceiling is dry and well-ventilated to prevent recurrence.
- Moisture Control: Address any underlying moisture issues that contributed to the mold growth. This may involve repairing leaks, improving ventilation, or adjusting humidity levels.
- Professional Advice: For extensive damage or if structural integrity is a concern, consult with a professional to ensure the restoration work is done safely and effectively.
HVAC System and Air Quality Management Post-Mold
The health of your HVAC system is crucial in maintaining good indoor air quality, especially after a mold remediation process. This section of the blog will discuss the importance of cleaning and restoring HVAC systems to ensure they are mold-free and functioning optimally, as well as strategies to enhance indoor air quality post-mold removal.
Cleaning and Restoring HVAC Systems
Post-mold remediation, it’s essential to ensure that your HVAC system is thoroughly cleaned and restored:
- Inspection and Assessment: Have a professional inspect your HVAC system for any signs of mold. Mold spores can spread through HVAC ducts, contaminating the entire system.
- Thorough Cleaning: All components of the HVAC system, including air ducts, filters, coils, and drain pans, should be cleaned thoroughly. This prevents mold spores from being circulated throughout the home.
- Filter Replacement: Replace all HVAC filters with new ones. Consider upgrading to HEPA filters, which can capture smaller mold spores more effectively.
- Repair and Maintenance: Address any issues such as leaks or moisture accumulation in the HVAC system, as these can lead to mold recurrence.
- Regular Monitoring: After cleaning and restoration, monitor the HVAC system regularly for any signs of mold. Regular maintenance checks are key to preventing future mold problems.
Improving Indoor Air Quality
Enhancing indoor air quality is vital after mold removal:
- Air Purifiers: Use air purifiers with HEPA filters to remove any remaining mold spores and other contaminants from the air.
- Humidity Control: Maintain indoor humidity levels between 30-50% to prevent mold growth. Dehumidifiers can be particularly useful in damp areas.
- Ventilation: Ensure proper ventilation in your home. Use exhaust fans in bathrooms and kitchens, and consider opening windows to allow fresh air circulation when weather permits.
- Natural Air Cleaners: Incorporate indoor plants that can help purify the air, such as spider plants or peace lilies, which are known for their air-cleaning properties.
- Regular Cleaning: Keep your home clean and dust-free. Regular vacuuming with HEPA-filtered vacuums can help reduce the presence of mold spores in the air.